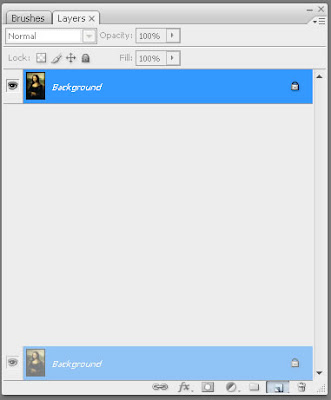
Step 2 Drag the "Background" over the layer icon to duplictate the background.
Step 3 Select the "Background Copy" and enter Filter > Liquidify or (shift+ctrl+x).
Then select the Freeze Mask Tool (F)
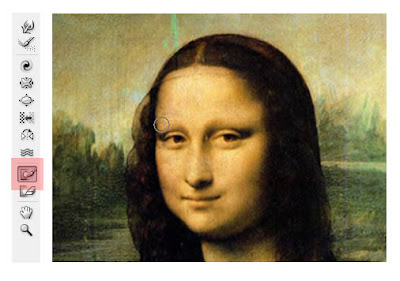
Step 4 With the Freeze Mask tool, carefully go around the eyes.
Use Thaw Mask Tool if you made any mistakes.
- Leave a little gap between the eye brows and the eyes for Warp tool.
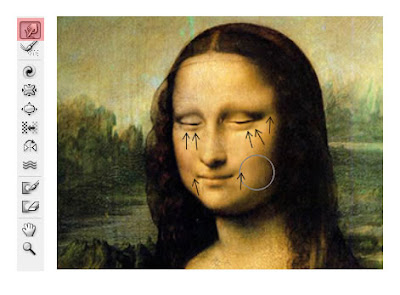
Step 5 Select Forward Warp Tool (W), and gently push down the eyes as shown.
- If you want winking, just push down one eye.
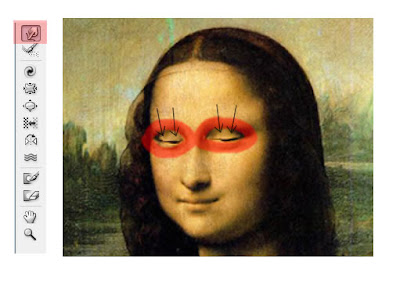
Step 6 Press OK and escape the Liquidfy filter.
Use the Dodge Tool (O) for finishing touch.
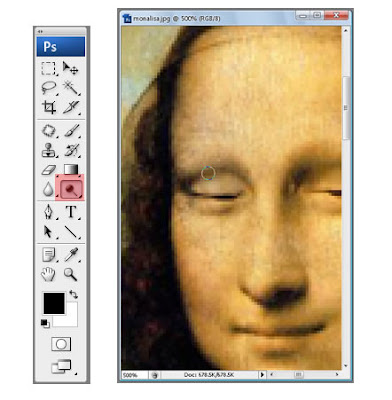
Step 7 Go back to Filter > Liquidify and use Forward Warp Tool as shown.
- This is to give natural looks when the picture blinks.
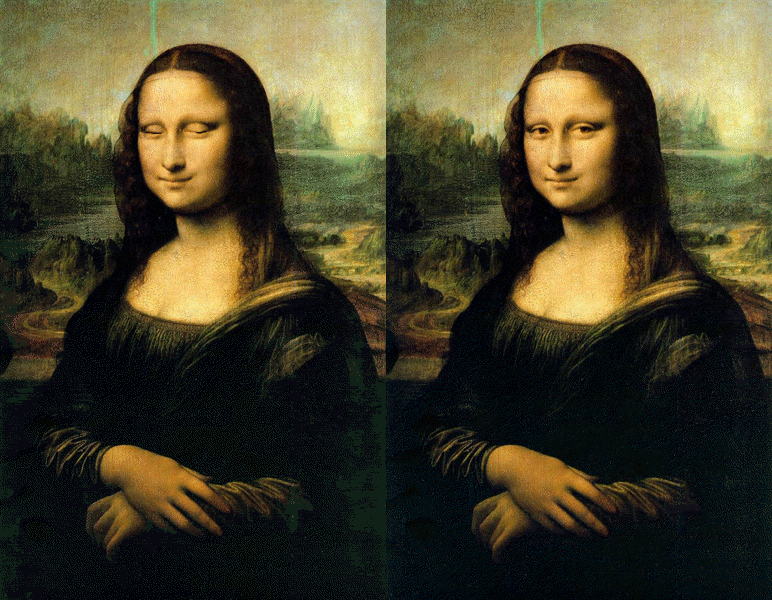
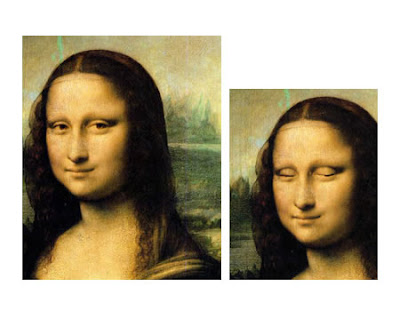
Left should be your original "Background", and "Background copy" at right.
 Step 8 Go to Window > Animation to make GIF animation.
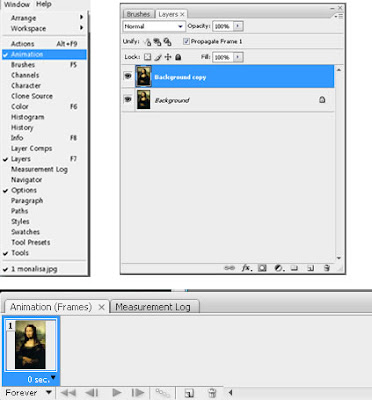
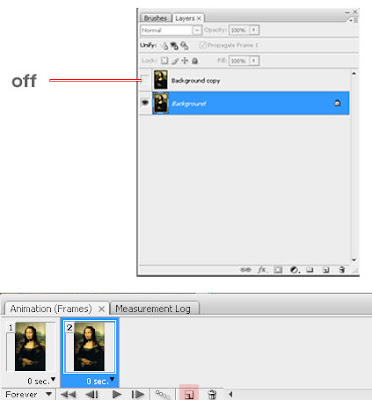
Step 9 Click "Duplicates selected frames" and turn the visibility off as shown.
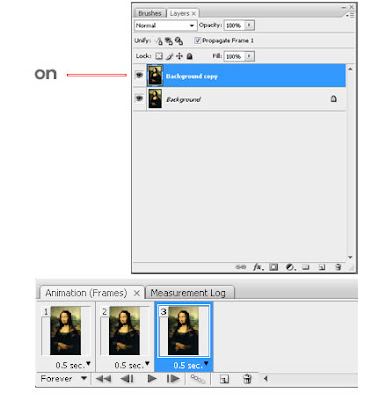
Step 10 Duplicate another frame and this time turn the visibility on.
Also set the delay time to 0.5 seconds.
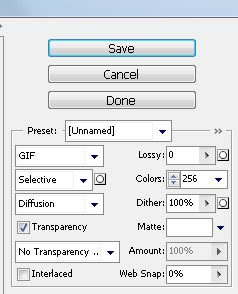
Step 11 Go to File > Save for Web & Devices and press save.
(make sure the preset is GIF)
And you are done!


21 comments:
Awesome tut. newbeeis keep it up
Thank.
Please may t use ins blog .
I TRIED THE TUTORIAL BUT I AM NOT ABLE TO SAVE THAT...A PROBLEM IS OCCURING THAT WHENEVER I SAVE IT, IT GET SAVE AS A PICTURE...
Anonymous- make sure it's saved as a GIF file.
http://i295.photobucket.com/albums/mm140/byeongchae/MonalisaLONOY.gif?t=1215026980
www.photomodel.ca --thanks for good tutorial.
thank you, this is wonderful!
I just done by myself and works!!
so clear tutorial thanks
this is truly amazing, thanks for posting this awesome tutorial.
you guys are all losers :p
Like a summbuuuuddddddy this is terrible
Thanks for your nice tutorial... very helpful for photo Editor.
This is a very good and more effective post. i have more benefited from your website. thanks a lot for this best idea
this is an awesome image gallery. thank you so much
Amazing tips for the photoshop. I read your article and see your image. I think I can do it now. Thank you so much.
Thank you so much for this lovely photo editing tips
clipping path service|Photo Retouching services|Vector Tracing
Can i do it using adobe cc 2019??
Thanks for Your Informative article.
Ghost Mannequin Effect
loved your tutorial. very easy to understand.
this was amazing post and talented thank for sharing https://clippingservicestudio.com/best-clipping-path-service-provider/
This was an amazing article. clipping path company
Great resources, thanks a lot
Post a Comment